Diferencia entre revisiones de «FESOL/201801/sor/manualwebhosting»
| Línea 71: | Línea 71: | ||
[[Archivo:paso 18.png]] | [[Archivo:paso 18.png]] | ||
| + | |||
| + | ===19 Habilitando sesiones FTP y TLS.=== | ||
| + | Con el comando: echo 1 > /etc/pure-ftpd/conf/TLS. | ||
| + | |||
| + | ===20 Creamos directorio para certificado SSL.=== | ||
| + | Con el comando: mkdir -p /etc/ssl/private/ | ||
| + | |||
| + | ===21 Generamos el certificado SSL.=== | ||
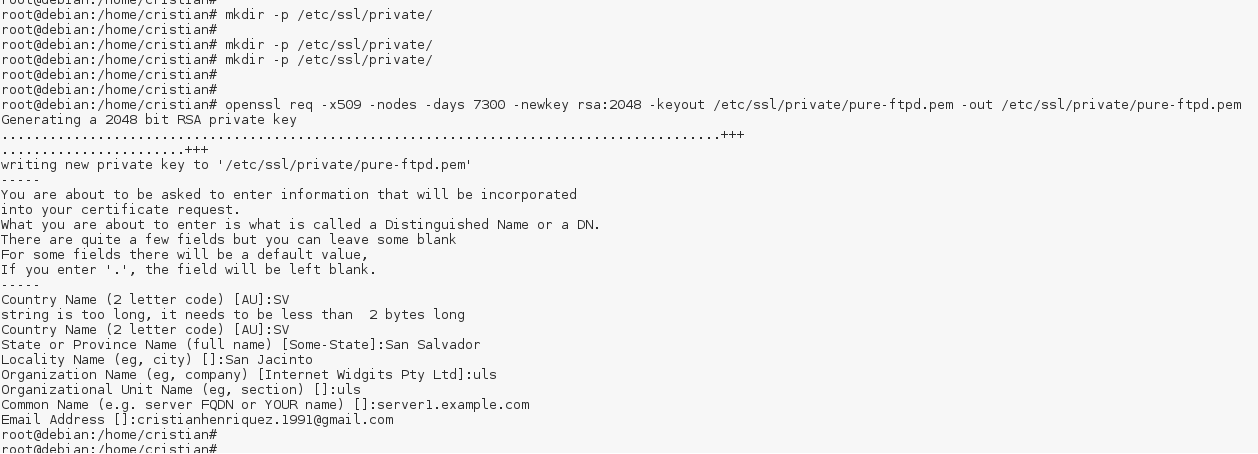
| + | Utlizaremo el siguiente comando: openssl req -x509 -nodes -days 7300 -newkey rsa:2048 -keyout /etc/ssl/private/pure-ftpd.pem -out /etc/ssl/private/pure-ftpd.pem. | ||
| + | Deberás llenar los datos que se pidan, según la siguiente imagen. | ||
| + | |||
| + | [[Archivo:paso 21.png]] | ||
| + | |||
| + | ===22 Le damos permisos al certificado SSL.=== | ||
| + | Con el comando: chmod 600 /etc/ssl/private/pure-ftpd.pem. | ||
| + | |||
| + | ===23 Reiniciamos el servicio PureFTPd.=== | ||
| + | Utilizando el comando: service pure-ftpd-mysql restart. | ||
| + | |||
| + | ===24 Editamos: /etc/fstab=== | ||
| + | Lo dejaremos con aparece en la imagen siguiente. | ||
Revisión del 21:17 6 jun 2018
Contenido
- 1 MANUAL DE INSTALACIÓN, CONFIGURACIÓN Y PRUEBAS DE ISPCONFIG
- 2 Pasos:
- 2.1 1 Instalación de servidor ssh.
- 2.2 2 Agregar lista de repositorios..
- 2.3 3 Actualizar repositorios.
- 2.4 4 Sincronizar el reloj del sistema.
- 2.5 5 Instalar: Postfix, Dovecot, MySQL, phpMyAdmin, rkhunter, binutils.
- 2.6 6 Abrir TLS / SSL y los puertos de envío en Postfix.
- 2.7 7 Reiniciar Postfix:
- 2.8 8 Configurando para que MariaDB escuche todas las interfaces.
- 2.9 9 Reiniciar MySQL.
- 2.10 10 Instalar Apache2, PHP5, phpMyAdmin, FCGI, suExec, Pear, And mcrypt.
- 2.11 11 Habilitar el Apache módulos.
- 2.12 12 Reiniciar Apache2
- 2.13 13 Instalar XCache and PHP-FPM.
- 2.14 14 Reiniciar Apache2
- 2.15 15 Instalar PHP-FPM.
- 2.16 16 Habilitar modulos y reiniciar apache2.
- 2.17 17 Instalar PureFTPd y cupos.
- 2.18 18 Configurando PureFTPd.
- 2.19 19 Habilitando sesiones FTP y TLS.
- 2.20 20 Creamos directorio para certificado SSL.
- 2.21 21 Generamos el certificado SSL.
- 2.22 22 Le damos permisos al certificado SSL.
- 2.23 23 Reiniciamos el servicio PureFTPd.
- 2.24 24 Editamos: /etc/fstab
MANUAL DE INSTALACIÓN, CONFIGURACIÓN Y PRUEBAS DE ISPCONFIG
Pasos:
1 Instalación de servidor ssh.
Con el comando apt-get install ssh openssh-server.
2 Agregar lista de repositorios..
Con cualquier editor de texto ingresamos a archivo sources.list nano /etc/apt/sources.list.
3 Actualizar repositorios.
Con el comando apt-get update y apt-get upgrade.
4 Sincronizar el reloj del sistema.
Con el comando apt-get install ntp ntpdate.
5 Instalar: Postfix, Dovecot, MySQL, phpMyAdmin, rkhunter, binutils.
Con los comandos: apt-get install postfix postfix-mysql postfix-doc mariadb-client mariadb-server openssl getmail4 rkhunter binutils dovecot-imapd dovecot-pop3d dovecot-mysql dovecot-sieve dovecot-lmtpd
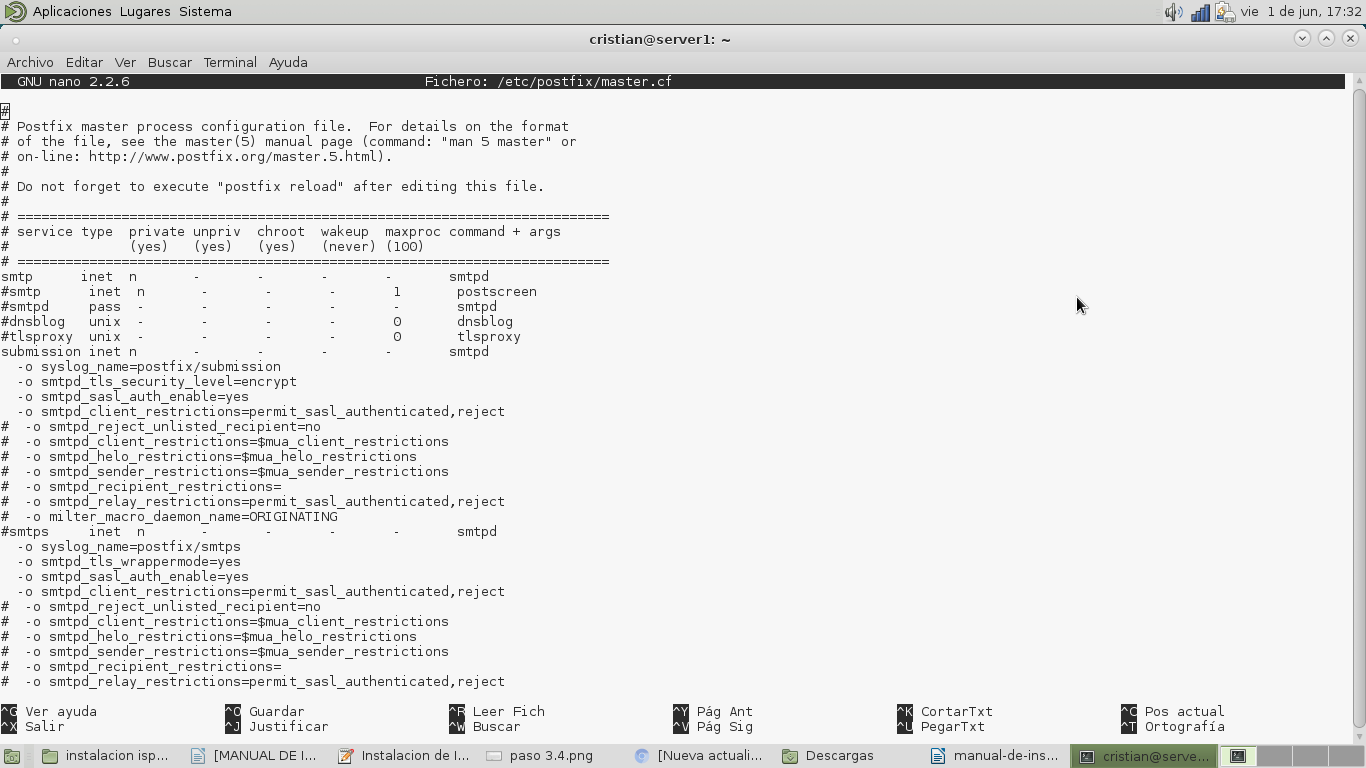
6 Abrir TLS / SSL y los puertos de envío en Postfix.
7 Reiniciar Postfix:
Con el comando service postfix restart.
8 Configurando para que MariaDB escuche todas las interfaces.
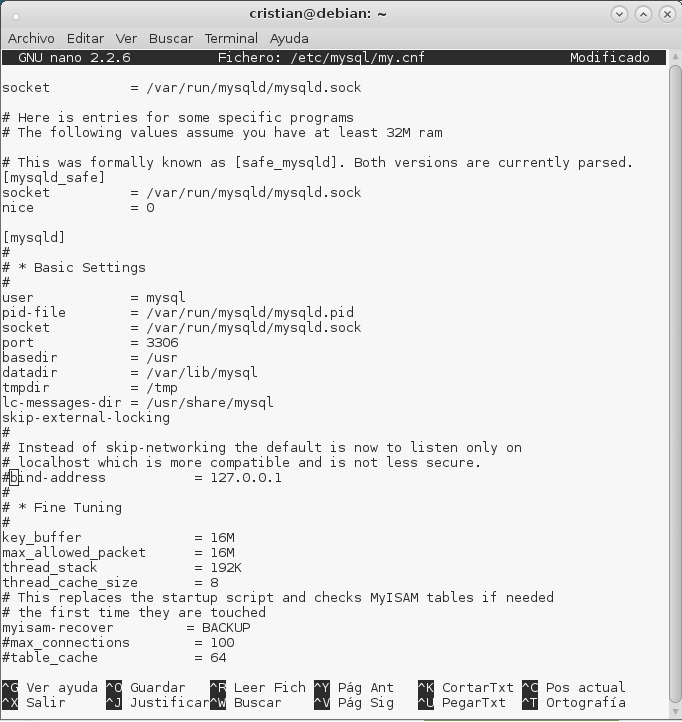
Editamos /etc/mysql/my.cnf y comentamos la línea bind-address = 127.0.0.1, para que no solo escuche en el localhost.
9 Reiniciar MySQL.
Con el comando: service mysql restart.
10 Instalar Apache2, PHP5, phpMyAdmin, FCGI, suExec, Pear, And mcrypt.
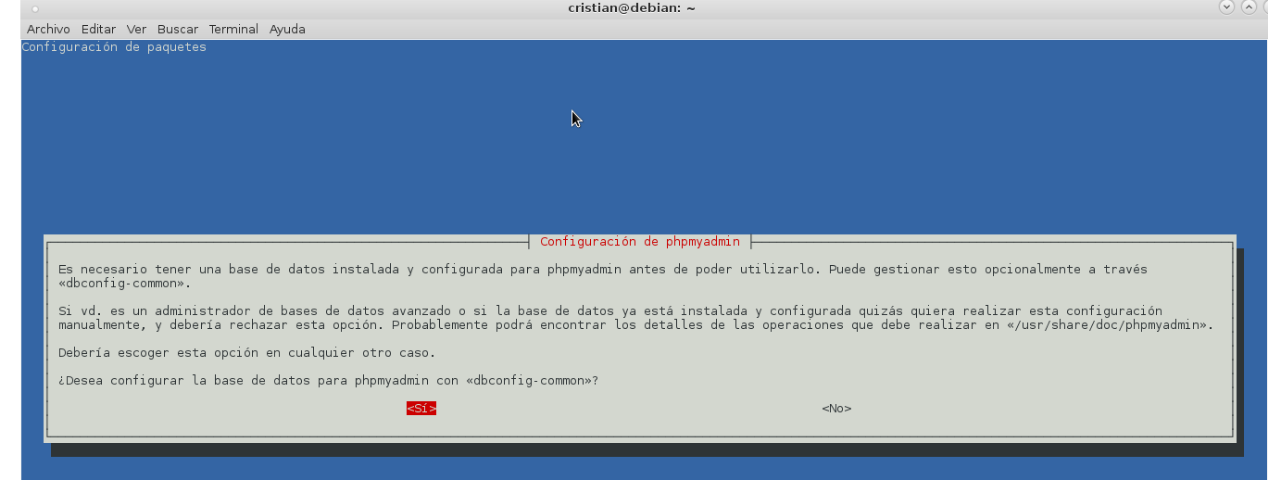
Con los comandos: apt-get install apache2 apache2.2-common apache2-doc apache2-mpm-prefork apache2-utils libexpat1 ssl-cert libapache2-mod-php5 php5 php5-common php5-gd php5-mysql php5-imap phpmyadmin php5-cli php5-cgi libapache2-mod-fcgid apache2-suexec php-pear php-auth php5-mcrypt mcrypt php5-imagick imagemagick libruby libapache2-mod-python php5-curl php5-intl php5-memcache php5-memcached php5-pspell php5-recode php5-sqlite php5-tidy php5-xmlrpc php5-xsl memcached libapache2-mod-passenger
11 Habilitar el Apache módulos.
Con el comando: a2enmod suexec rewrite ssl actions include dav_fs dav auth_digest cgi.
12 Reiniciar Apache2
Con el comando: service apache2 restart.
13 Instalar XCache and PHP-FPM.
Con el comando: apt-get install php5-xcache.
14 Reiniciar Apache2
Con el comando: service apache2 restart.
15 Instalar PHP-FPM.
Con el comando: apt-get install libapache2-mod-fastcgi php5-fpm.
16 Habilitar modulos y reiniciar apache2.
Utilizaremos los comandos: a2enmod actions fastcgi alias. service apache2 restart.
17 Instalar PureFTPd y cupos.
Con los comandos: apt-get install pure-ftpd-common pure-ftpd-mysql quota quotatool.
18 Configurando PureFTPd.
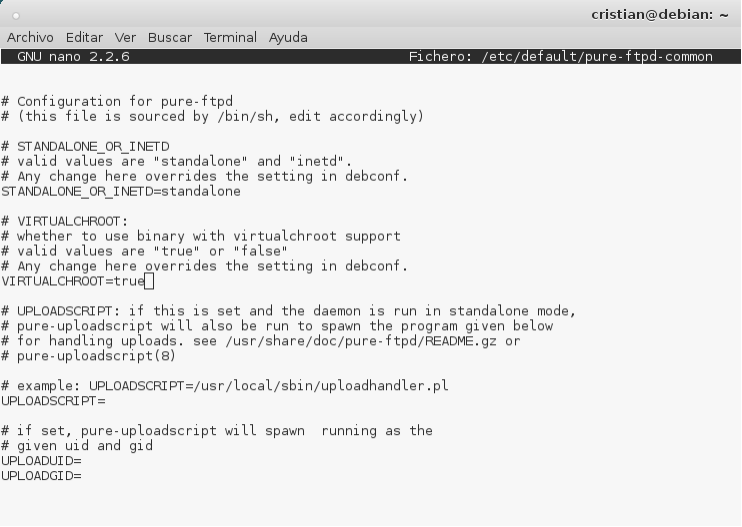
Editar el archivo /etc/default/pure-ftpd-common. Descomentar las lineas STANDALONE_OR_INETD=standalone y VIRTUALCHROOT=true, en algunos ya viene asi por defecto.
19 Habilitando sesiones FTP y TLS.
Con el comando: echo 1 > /etc/pure-ftpd/conf/TLS.
20 Creamos directorio para certificado SSL.
Con el comando: mkdir -p /etc/ssl/private/
21 Generamos el certificado SSL.
Utlizaremo el siguiente comando: openssl req -x509 -nodes -days 7300 -newkey rsa:2048 -keyout /etc/ssl/private/pure-ftpd.pem -out /etc/ssl/private/pure-ftpd.pem. Deberás llenar los datos que se pidan, según la siguiente imagen.
22 Le damos permisos al certificado SSL.
Con el comando: chmod 600 /etc/ssl/private/pure-ftpd.pem.
23 Reiniciamos el servicio PureFTPd.
Utilizando el comando: service pure-ftpd-mysql restart.
24 Editamos: /etc/fstab
Lo dejaremos con aparece en la imagen siguiente.
